Introduction
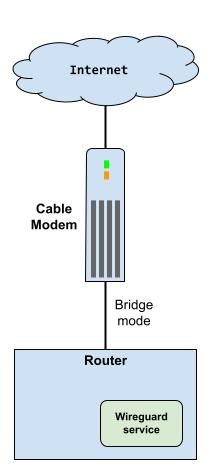
In the previous post I went live with the nix router that I staged in the lab. In this post I add in a Wireguard VPN so I can access some subnets/vlans from away from home.
We’ll set up Wireguard using the nix package and add firewall rules for it. Additionally, we’ll use Route53 to add A records for the router and some internal servers.
Step 1 - Wireguard Service
I originally wanted to use Tailscale for remote access to my home network. Typically that requires installing the Tailscale client on each machine that will participate in the overlay network. But they do have the concept of a Subnet Router. Ultimately I concluded that Tailscale was not compatible with how I was building my network. Tailscale modifies the machine’s firewall rules. You can start it with a flag to prevent this and make the rules yourself. I looked at the rules it creates and thought about which ones I would need and how I could port them to my network. I decided it was too much work. Instead, integrating a Wireguard adapter would fit right into the rule pattern I already have for physical and virtual adapters.
Wireguard uses a client/server design. Tailscale does as well, but they run the servers. Tailscale has an outstanding STUN service which you can read about here and also in this great episode of Security. Cryptography. Whatever. with Avery Pennarun and Brad Fitzpatrick of Tailscale. After listening to that podcast, I wanted to use Tailscale so badly because they handle some nasty NAT environments, but alas…
Wireguard server in nix router
I have to run my own server. I could do this in a small EC2 or Digital Ocean instance, but then I’d have to pay to keep a VM running 24/7. So I’ll just use the nix package on my own hardware.

To start, I add a few new packages to the configuration.nix file. Wireguard is part of the kernel, so you don’t need a package to run it, but having the CLI tools on the router is nice.
environment.systemPackages = with pkgs; [
  pciutils
  tcpdump
  wireguard-tools
  awscli
  jq
];
Next, I add in the wireguard section to the networking configuration.
networking = {
  ...
  wireguard = {
    enable = true;
    interfaces = {
      wg0 = {
        ips = [ "10.54.96.1/24" ];
        listenPort = 5000;
        privateKeyFile = "/etc/wireguard-keys/private";
        peers = [
          {
            publicKey = "+KrXDn1+pCuJ+W2znD856zCtlVH9aJ/se46QyDSmaF4=";
            allowedIPs = ["10.54.96.102/32" ];
          }
          {
            publicKey = "EK0qFeGGdreT2kKLjD3FxAUWzKTmtFMHO1gTy9EoP2M=";
            allowedIPs = ["10.54.96.103/32" ];
          }
        ];
      };
    };
  };
I’m not going to say much about this, since there are so many Wireguard tutorials online, but note:
10.54.96.1/24defines the Wireguard server’s IP and the VPN subnet.- You may need to play around with the port depending one any restrictions that exist with your internet provider, or client networks, like cellular. At one point I was using UDP 443.
- The
privateKeyFileis a secret. Nix has ways of managing secrets. I spent a few hours looking at those options, and nope’d out. I just made a directory and SCP’d a private key I generated on my laptop.
This is enough to get Wireguard up and running. Next we’ll look at the firewall rules.
Step 2 - Firewall rules for Wireguard
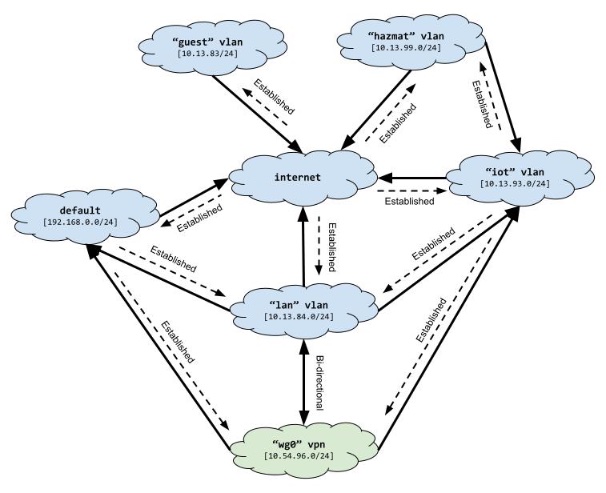
Changes and additions were required in the input and forward chains.
- In the input chain, we are accepting traffic destined to the router. This is so I can SSH into the router from away from home.
- On the WAN adapter (enp1s0), we are accepting Wireguard traffic on port 5000. I should be using a variable for the port number since it’s also used in the Wireguard config, but I’m lazy.
- Allow traffic from WG0 to IoT.
- Allow established traffic from IoT to WG0.
- Allow traffic from WG0 to the management lan, 192.168.1.0/24.
- Allow unsolicited traffic between WG0 and LAN.
  chain input {
    type filter hook input priority 0; policy drop;
    iifname { "enp2s0", "lan", "wg0" } accept comment "Allow local and wg network to access the router"
    iifname { "enp1s0" } ct state { established, related } accept comment "Allow established traffic"
    iifname { "enp1s0"} icmp type { echo-request, destination-unreachable, time-exceeded } counter accept comment "Allow select ICMP"
    iifname "iot" ip saddr { 10.13.93.14 } udp dport { mdns, llmnr } counter accept comment "multicast for media devices, printers"
    iifname "enp1s0" udp dport 5000 counter accept comment "Allow UDP 5000 for Wireguard"
    iifname "enp1s0" counter drop comment "Drop all other unsolicited traffic from wan"
  }
  chain forward {
    type filter hook forward priority 0; policy drop;
    iifname { "enp2s0", "lan", "iot", "guest", "hazmat" } oifname { "enp1s0" } accept comment "Allow All to WAN"
    iifname { "enp1s0" } oifname { "enp2s0", "lan", "iot", "guest", "hazmat" } ct state { established, related } accept comment "Allow established back to All"
    iifname { "lan", "hazmat", "wg0" } oifname { "iot" } counter accept comment "Allow trusted LAN to IoT"
    iifname { "iot" } oifname { "lan", "hazmat", "wg0" } ct state { established, related } counter accept comment "Allow established back to LANs"
    iifname { "lan", "wg0" } ip daddr 192.168.1.0/24 counter accept comment "Allow trusted LAN/WG to Mgmt (default)"
    ip saddr 192.168.1.0/24 oifname { "lan", "wg0" } ct state { established, related } counter accept comment "Allow established back to LAN/WG"
    ip saddr { 10.13.93.16, 10.13.93.17 } oifname { "enp1s0" } counter drop comment "Block wiz bulbs from internet"
    iifname { "lan", "wg0" } oifname { "lan", "wg0" } counter accept comment "Allow lan/Wireguard bi-directionaly"
    ip saddr 10.13.93.50 ip daddr 10.13.84.20 tcp dport 22 counter accept comment "allow ssh from home assistant to agent for backup"
  }
}
Now with these rules in place, our network looks like this.

Step 3 - DIY DynDNS
We’re almost done, but the cable company does not give me a static IP address. I have this domain jjpdev.com registered with Amazon Route53. I added an A record for the router, home.jjpdev.com. Now I just need a script to run every hour, check my IP address, and if it’s changed, update the A record record. Everything must be done with systemd. If you use crontab a meteor will hit your house.
Earlier I added the awscli and jq nix packages. Here’s why. Below is a bash script and a JSON template. The script uses the AWS CLI to get the IP address currently assigned to home.jjpdev.com and compares it to the router’s WAN IP. If they are different, it makes a request to Route53 to update the IP.
#!/run/current-system/sw/bin/bash

IAM_ROLE_ARN=<insert role arn>
HOSTED_ZONE_ID=<insert hosted zone id>
FROM_EMAIL=<insert from email>
TO_EMAIL=<insert to email>

sess_creds=$(aws sts assume-role --role-arn $IAM_ROLE_ARN --role-session-name update_ip)

export AWS_ACCESS_KEY_ID=$(echo $sess_creds | jq -r .Credentials.AccessKeyId)
export AWS_SECRET_ACCESS_KEY=$(echo $sess_creds | jq -r .Credentials.SecretAccessKey)
export AWS_SESSION_TOKEN=$(echo $sess_creds | jq -r .Credentials.SessionToken)

echo $(aws sts get-caller-identity)

wan_ip=$(ip -json addr show dev enp1s0 | jq -r '.[0] | .addr_info[] | select(.family == "inet")| .local')
echo "WAN IP: ${wan_ip}"

dns_ip=$(aws route53 list-resource-record-sets --hosted-zone-id $HOSTED_ZONE_ID --output json | jq -r '.ResourceRecordSets[] | select(.Name == "home.jjpdev.com.") | .ResourceRecords[0].Value')
echo "DNS IP: ${dns_ip}"

if [ "${wan_ip}" != "${dns_ip}" ]; then
  cp /root/r53template.json /root/t.json
  sed -i "s/IP_TO_REPLACE/${wan_ip}/" /root/t.json
  aws route53 change-resource-record-sets --hosted-zone-id $HOSTED_ZONE_ID --change-batch file:///root/t.json
  rm -rf /root/t.json

  email_body="Old IP: ${dns_ip}. New IP: ${wan_ip}"

  aws ses send-email --from $FROM_EMAIL --to $TO_EMAIL --subject "home.jjpdev.com IP Address Changes" --text $"$email_body"
else
  echo "IPs the same, doing nothing"
fi
Here is the JSON template that will make up the body of the request.
{
    "Comment": "UPSERT a record ",
    "Changes": [{
        "Action": "UPSERT",
        "ResourceRecordSet": {
            "Name": "home.jjpdev.com",
            "Type": "A",
            "TTL": 300,
            "ResourceRecords": [{ "Value": "IP_TO_REPLACE"}]
        }
    }]
}
To run the script on a schedule, I used a systemd one-shot service and a timer. The value for environment.PATH is just what I got from logging in and running echo $PATH. There may be a better way.
systemd = {
  services = {
    updateRoute53 = {
      wantedBy = [ "multi-user.target" ];
      wants = [ "updateRoute53Timer.timer" ];
      description = "Update public IP of cable modem in Route53 DNS record";
      environment = {
        PATH = lib.mkForce "/run/wrappers/bin:/root/.nix-profile/bin:/etc/profiles/per-user/root/bin:/nix/var/nix/profiles/default/bin:/run/current-system/sw/bin";
      };
      serviceConfig = {
        Type = "oneshot";
      };
      script = ''
        /root/update-ip.sh
      '';
    };
  };
  timers = {
    updateRoute53Timer = {
      description = "Timer for the updateRoute53 service";
      wantedBy = [ "timers.target" ];
      requires = [ "updateRoute53.service" ];
      timerConfig = {
        OnCalendar = "*-*-* *:00:00";
        Unit = "updateRoute53.service";
      };
    };
  };
};
Step 4 - Configure Wireguard clients
Now we have a DNS name for internet access to the router. We can configure a Wireguard client. For my phone, I create a config file like this (not my real keys!).
[Interface]
PrivateKey = +PAJBbAUFlkISsUePyQ8Vk25qRuquKBbNQvO9Ijxz0w=
Address = 10.54.96.102/32

[Peer]
PublicKey = CZN1i1JUUqPeXlp7a+7P4Tf040dFt0tC3xpaSj531mw=
AllowedIPs = 10.54.96.0/24, 10.13.93.0/24, 192.168.1.0/24
Endpoint = home.jjpdev.com:5000
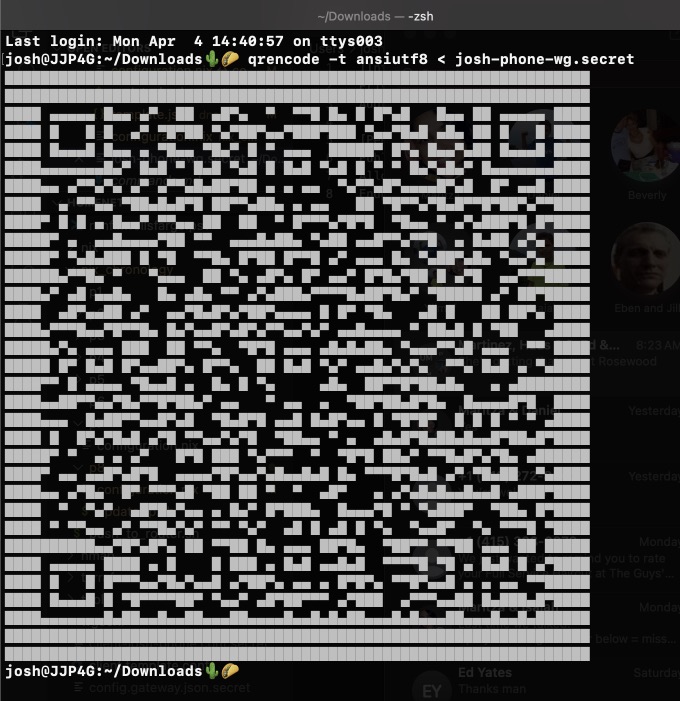
Then I run qrencode -t ansiutf8 < josh-phone-wg-config.secret which prints a QR code in the terminal. The Wireguard phone app can create a new VPN from the QR code.

 JJP Software